



How to Replace an Old ABB Purge Controller with AEXB-02 (3HNE06225-1)?
When an industrial automation system fails, production downtime can cost thousands of dollars per hour. If your hazardous area protection system triggers an error, the culprit is often an aging or faulty ABB Purge Controller. Specifically, legacy control systems used in automotive painting lines, robotic cells, and explosive atmospheres rely heavily on the ABB AEXB-02 Ex Interface Board.
Finding a direct drop-in replacement that complies with strict modern safety standards can be a challenging task for procurement managers and maintenance engineers alike. If your current system is down, you are likely asking: How can I seamlessly replace my legacy unit without rewriting system codes or modifying complex cabinet layouts?
The definitive answer lies in upgrading to the authentic 3HNE06225-1 module. This comprehensive guide will walk you through the technical specifications of the ABB AEXB-02, explain its pin-to-pin backward compatibility, and provide a step-by-step installation methodology to safely restore your factory operations.
Understanding the Role of the ABB AEXB-02 in Hazardous Environments
Before initiating a hardware swap, it is essential to understand what the ABB Purge Controller actually does within an automated industrial ecosystem. In environments containing flammable gases, vapors, or combustible dusts, electrical equipment poses a severe ignition risk. To mitigate this hazard, industry regulations demand robust explosion protection methodologies.
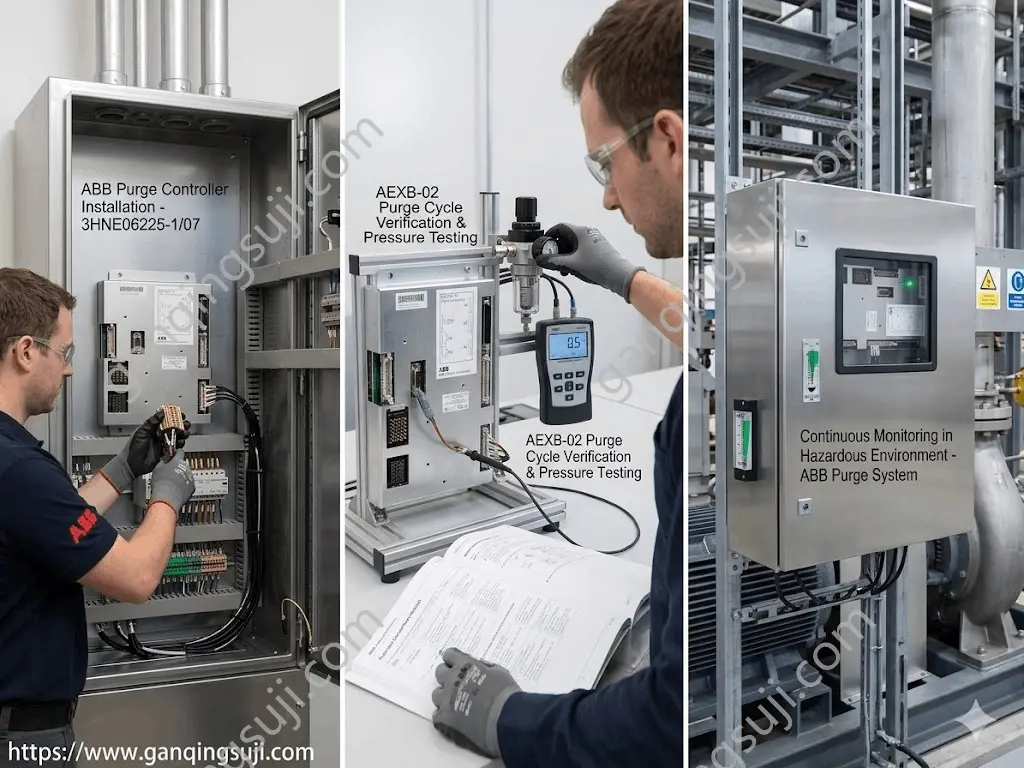
The ABB AEXB-02 operates on the principle of pressurized enclosure protection (Type Ex p). It regulates the flow of protective gas (usually compressed air or inert gas) into the electrical enclosure, creating a positive internal pressure relative to the surrounding hazardous atmosphere. This pressure differential physically prevents explosive mixtures from entering the cabinet.
Key safety operations managed by this module include:
● Pre-operational Purging: Flushing the cabinet with a high volume of clean air to remove any pre-existing hazardous gases before the main electronics are energized.
● Continuous Monitoring: Real-time tracking of internal enclosure pressure and flow rates to detect leaks or structural breaches immediately.
● Automatic Interlocking: Instantly isolating power to non-certified internal components if the enclosure pressure drops below the safety threshold.
By acting as the central intelligence of the Ex p safety system, any malfunction in this interface board will completely halt the surrounding automation processes, making a rapid, reliable replacement absolutely critical.
Technical Breakdown: Core Specifications of the 3HNE06225-1 Module
When sourcing a replacement, cross-referencing part numbers is the most effective way to eliminate compatibility risks. The product label contains several vital identifiers that verify its engineering pedigree and global safety compliance.
On an authentic factory unit, you will observe the following critical technical stampings:
1. Model Identifier: AEXB-02 Ex Interface Board
2. Global Material Number (Part Number): 3HNE06225-1 (often listed with variants like 3HNE06225-1/07 depending on production lots)
3. Safety Markings: Certified under ATEX guidelines, featuring the prominent hexagon Ex logo followed by II (2) G D, which designates suitability for gas and dust explosion-hazard zones.
4. Terminal Architecture: The physical interface features dedicated, isolated connector blocks marked clearly as X1, X2, X3, X4, X5, X6, and X7.
Interface and Terminal Layout Mapping
● X1 / X2 / X3 Blocks: Handle the primary power distribution, high-voltage interlocks, and master relay control loops that tie into the main facility emergency stop (E-Stop) system.
● X4 / X5 Links: Serve as low-voltage digital and analog signal channels, carrying real-time feedback data regarding pressure transducers and flow switches.
● X6 / X7 Pin Arrays: Provide direct serial communication links back to the primary ABB robot controller or central Programmable Logic Controller (PLC) cabinet.
Why Compatibility Matters: Avoid Third-Party Knockoffs
Procurement teams are occasionally tempted by low-cost, third-party aftermarket universal boards. However, in hazardous area automation, replacing an authentic ABB Purge Controller with a non-OEM component introduces catastrophic operational and legal liabilities.
● Loss of ATEX Certification: The legal safety certification of your entire control cabinet or robotic cell relies on component-level compliance. Installing a non-certified board immediately voids the facility’s Ex p safety rating, creating massive compliance issues during insurance or regulatory audits.
● Signal Timing Imbalances: The 3HNE06225-1 utilizes a highly specialized microprocessor array optimized for specific safety-critical reaction times. Generic boards frequently suffer from propagation delays, leading to false pressure drop alarms and disruptive nuisance tripping.
● Physical Form Factor Matching: The authentic ABB AEXB-02 is engineered with precise mounting hole dimensions and shield grounding points designed to slip smoothly onto existing backplates. Aftermarket solutions often require drilling new holes or adding custom brackets, increasing installation time and introducing metal shavings into live electrical enclosures.
Pre-Replacement Checklist: Preparing for a Safe Hardware Swap
Industrial safety demands that hardware replacements follow strict lockout-tagout (LOTO) protocols. Before removing your old ABB AEXB-02 interface board, ensure that your maintenance crew completes the following preparatory checklist:
1. Isolate Primary Power: Turn off and lock out the main circuit breaker feeding the control cabinet. Verify the absence of voltage using a calibrated multimeter.
2. Shut Off Pneumatic Supply: Close the main air regulator valve feeding the purge system. Bleed off any residual compressed air trapped within the manifold lines.
3. Implement Electrostatic Protection: The 3HNE06225-1 contains sensitive complementary metal-oxide-semiconductor (CMOS) components. Operators must wear a grounded Electrostatic Discharge (ESD) wrist strap during handling to prevent static punctures to the microchips.
4. Document Existing Wiring: Even though original terminal layouts are standardized, take high-resolution photographs of the existing wiring configurations on blocks X1 through X7 before disconnecting any wires.
Step-by-Step Installation Guide for the ABB AEXB-02
Once the work environment is fully secured, follow these step-by-step procedures to mount and configure your new ABB Purge Controller:
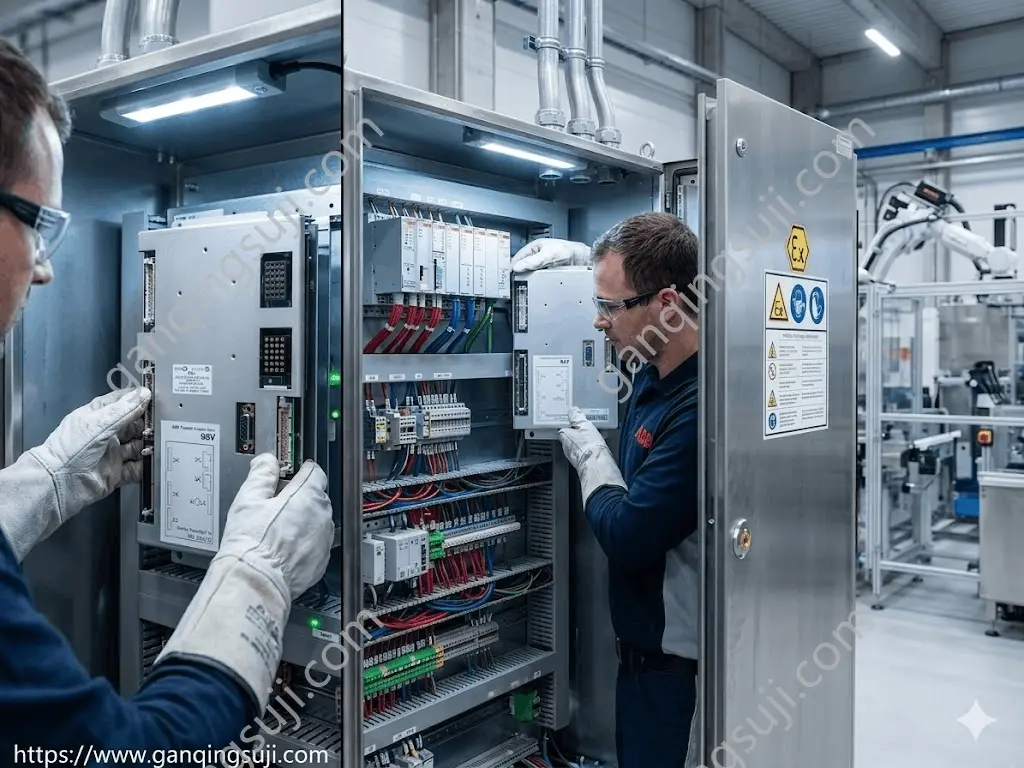
Step 1: Removing the Legacy Module
Carefully unthread the communication cables from the X6 and X7 serial ports. Using an insulated terminal screwdriver, loosen the retention screws on the terminal blocks (X1–X5) and gently pull the wire harnesses away from the board. Support the weight of the module while unfastening the four primary corner mounting screws from the cabinet backplate.
Step 2: Inspecting the Enclosure Interior
Before mounting the new board, inspect the mounting plate for signs of corrosion, oxidation, or tracking. Clean the area with an approved electronics contact cleaner to ensure a low-resistance electrical ground connection through the metal chassis.
Step 3: Mounting the New 3HNE06225-1 Board
Align the new ABB AEXB-02 module with the pre-existing cabinet standoffs. Hand-tighten all four mounting screws to ensure proper alignment before securing them firmly with a torque screwdriver. Do not over-tighten, as excessive torque can stress the multilayer Printed Circuit Board (PCB).
Step 4: Reconnecting the Terminal Harnesses
Reattach the terminal blocks in exact accordance with your pre-removal photographs and original wiring diagrams. Ensure every wire strand is fully seated within the screw clamp to prevent high-resistance hot spots or intermittent signal losses caused by factory vibrations.
Step 5: Serial Link Integration
Securely seat the heavy-duty communication interface cables into ports X6 and X7. Tighten the integrated thumb-screws on the D-sub connectors to prevent accidental disconnects during automated robotic movements.
Commissioning, Testing, and Purge Cycle Verification
With the mechanical and electrical installation complete, the system must undergo a formal commissioning phase to validate its safety parameters before returning the production line to active service.
Initial Power-On Diagnostics
Restore primary electrical power to the cabinet while keeping the pneumatic supply closed. Observe the local LED status indicators on the ABB Purge Controller. The board should execute a self-diagnostic routine, revealing a low-pressure fault status code—this confirms that the digital interlocking circuits are functioning correctly and preventing unauthorized system boot-ups.
Pneumatic Balancing and Pressure Testing
Slowly open the pneumatic supply valve and adjust the upstream air regulator to the manufacturer’s specified input pressure. Watch the system’s digital manometer or pressure gauge. Clean air will begin to fill the enclosure, and the internal pressure should rise steadily toward its nominal operating envelope (typically between 2.5 mbar and 5.0 mbar, depending on enclosure volume).
Purge Cycle Verification
The system will now enter its timed pre-purge phase. The ABB AEXB-02 calculates the exact volume of air passed through the enclosure based on flow sensor inputs. Do not interrupt this process. Once the required purge volume is safely achieved, the module's safety relay will click shut, authorizing the main PLC or robot controller to power up completely.
Troubleshooting Common Installation Errors
If the system fails to complete the commissioning phase, check for these common deployment issues:
● Error: Intermittent Communication Loss (X6/X7 Faults): Check for EMI (Electromagnetic Interference). Ensure that serial communication cables are properly shielded and kept separate from high-voltage AC motor lines inside the wire tracking.
● Error: Purge Cycle Timeout: This indicates the system cannot reach or sustain the required purge flow rate. Inspect the cabinet door gaskets for physical dry-rot or tears, and verify that the automated mechanical exhaust vent is opening fully.
● Error: Nuisance Overpressure Alarms: If the internal enclosure pressure spikes too high, it can damage sensitive electronic displays. Dial back the primary pressure regulator slightly until the system stabilizes within its ideal operating range.
Conclusion: Secure Your Factory's Future with Authentic Spare Parts
Replacing an old ABB Purge Controller with a genuine ABB AEXB-02 (3HNE06225-1) Ex Interface Board is the single most effective way to ensure optimal system uptime, total employee safety, and continuous regulatory compliance. By following strict installation guidelines, maintaining clean pneumatic feeds, and executing thorough purge cycle verifications, you can extend the service life of your automated machinery for years to come.
Do not gamble with unauthorized components or delayed supply chains when production schedules are on the line. We maintain an active inventory of factory-original, brand-new-in-box industrial automation spare parts ready for immediate international dispatch.
Ready to minimize your downtime? Contact our technical procurement team today to request a rapid price quote on an authentic 3HNE06225-1 module, or chat with our application engineers for personalized cross-referencing support!